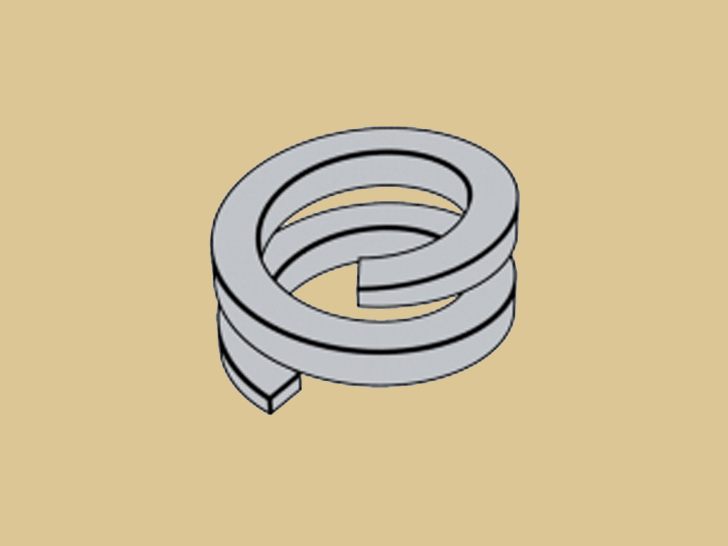
In preparing a helical spring washer for hardness testing, it should first be twisted to remove the helix and form a near flat surface. Due to the trapezoidal cross section of the washer, both sides must be filed or ground flat to assure accurate readings. This also removes decarburization and plating from the surface. Care must be taken to assure that surface temperature does not exceed 250°F during this operation. (See figure.) An essential requirement of the Rockwell test is that the penetrator be perpendicular to the surface of the test piece and that the test piece not move, in the slightest degree, as the test load is applied. One point of hardness represents a depth of only 0.00008". A movement of only .001" could cause an error of over 10 Rockwell numbers. Penetration should be made in the center of the washer’s flattened surface and readings should not be taken too close together. If the indentation is made too close to the edge of the test washer, the material will yield, giving incorrect low readings. Also, the area surrounding the indent will be cold worked. Subsequent indentations, if made in the cold worked area, will give incorrect readings-usually higher that the virgin material. Also, test penetrations should be made on only one side of the washer. The thickness of the test sample will determine the correct testing weight to use. Refer to Rockwell test charts to determine proper weight and scale use. To insure the most accurate readings, use the maximum weight possible. However, caution should be taken not to use a weight greater that the width and thickness will accommodate.
How to prevent mistake in HARDNESS TESTING of Spring washer?